Monday 26 December 2011

Steamed Barbecue Buns

Hi!

I've not disappeared!  Just enjoying time as a mum and watching little "leaf" develop into a funny little, cheeky, lovable chappie!  So I apologise for not keeping you all posted! 

Minh's first birthday has come and gone and I will have to load up some photos of his grand day.  We decided to get caterers for the food but I made all the desserts.  This was a mighty affair!  We had: Lemon Cheesecake; Blueberry Cheesecake; Fresh Fruit and Cream Gateaux; Tropical Fruit salad (ok, this one was bought in!) and Minh's crowning glory, a 3-tier birthday cake!  Tiers were: lemon with homemade lemon curd, vanilla with homemade jam and to top, a gluten-free carrot cake with lemon butter icing!  I also made iced biscuits for the children's party bags!  Yes!  It was hard work especially as cakes cannot be made too far in advance!  Can you understand why we had caterers in now? 


Just thought I'd share a Steamed Bun recipe - it's a favourite of mine as it uses baking powder as the raising agent - not yeast which I find can taint the taste of steamed buns.  (I'm sure I'd promised to share the recipe?)  Little Leaf and Daddy Leaf enjoyed the buns and its lovely to see them sat on the bottom step opposite the door to the kitchen sharing a bun.  (Little Leaf doesn't eat the filling - he's a bit funny like that!)

Still not quite as white and cloud-like as restaurant buns but tasty all the same :)


Steamed Barbecue Buns


Ingredients:

Bun Dough
250 g (2.5 cup) Special Bun Flour  (I use chinese bun flour as the UK supermarket flour makes an off white dough and doesn't result in a white fluffy bun)
18 g (3.5 tsp) baking powder
45 g (3 tblsp) caster sugar
30 g (2 tblsp) white vegetable fat (Trex) or vegetable oil (or lard)
120 ml (1/2 cup) water (approx)
1/2 teaspoon white vinegar

Method:

  • Sift flour and baking powder into a bowl add sugar and mix, rub in the vegetable fat/lard with your fingertips until evenly distributed. (If using oil, just add oil with the vinegar and water.)
  • Add water and vinegar together and knead until a fairly soft dough.
  • Shape into a ball and let it rest, covered, for 30 minutes.
To make the buns
  • Divide the dough into12 portions.
  • Mould each into a smooth ball.
  • Roll each out on a lightly floured surface to a circle about 4 inches across.
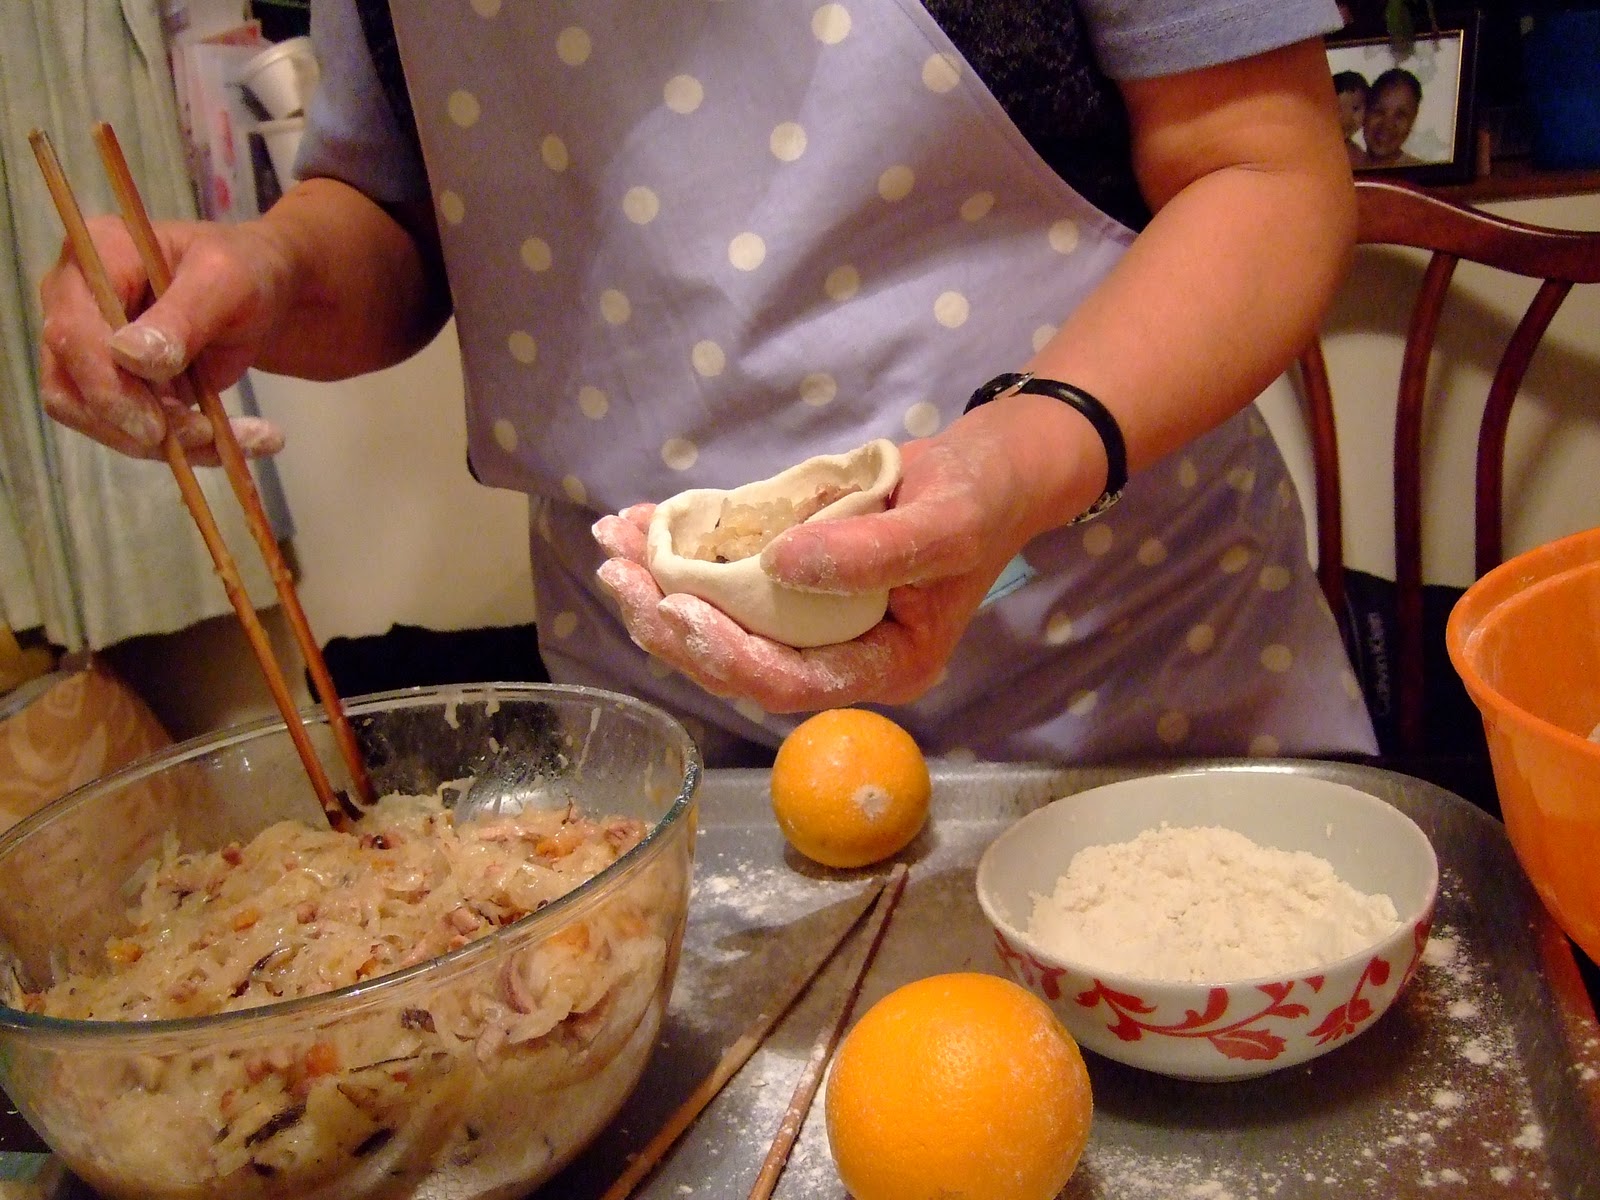
  • Put a heaping teaspoon of filling in the centre and gather the edges inward, folding and pleating to make a neat join.
  • Twist dough to seal.
  • Put each bun, join upwards, on a flattened paper cake case, in a steamer.
  • Cover and steam for 15 minutes.
  • Serve warm.
The filling for today's buns was Barbecue Pork -  I'm fortunate enough to have a supplier for this - also known as my mum, "Mrs Plum".  Here's how I made my filling:


Barbecue Pork Filling:

160 g barbecue roast pork (thinly sliced into 1cm sized pieces)
1 shallot (very finely diced)
100 g water
1.5 tsp Lee Kum Kee “Char Siu Sauce”
1 tsp oyster sauce
15 ml water
1 tsp cornflour

Fry shallot in a little oil, add finely sliced barbecue pork and fry gently for 2 minutes. Add water, char siu sauce and oyster sauce. Simmer for 3 minutes. Thicken with cornflour/water mix. Taste sauce for seasoning. Allow to cool slightly before using as bun filling.

Recipe adapted from www.recipezaar.com/11087

I will upload some piccies of the steamed buns later - the buns have disappeared so quickly I'm off to make another batch!

Hot steamy action!


I hope you are enjoying the festive period and are enjoying time with friends family and some great food!


My two taste-testers!  If the son & hubbs approve it must be good! :D


Thursday 19 May 2011

Lemon & Blueberry Macarons


Macarons are still all the rage in the baking world.  These little beauties look so cute but are difficult to master!  There are many recipes and blogs out there teaching you the basics but I think its something you probably need to see and feel to know you are getting it right. 

My first attempt was laughable.  More like an almond gooey cookie.  See I took some photos of shame - they are at the bottom of this post, Macaron Madness.

My second attempt I thought were great until I tried to peel them off the paper.  Hmmm...wet bases.  Also, they were rather flat.

You can just about make out the green tea mac's atthe back.  I split the batch and made two flavours.


Attempt number 3 was lemon macarons.  I need to practice the piping too!

Filled with lemon butter icing and a lemon curd centre - lemonicious!

Attempt number 4 was blueberry.  These were filled with fresh blueberry coulis and lemon butter icing.  These macaron shells I managed to cook perfectly but forgot to push in the 'tails' on my blobs.  These had an amazing chewy texture, the warm fruity gooey blueberry centre and a refreshing lemon flavour!  Oh my!  I can understand how people get addicted to these! :D

Blueberry & Lemon - these were soo good!  Again lemon butter icing but with a fresh blueberry coulis.

When I tasted the lemon one I thought, "Hmmm....nice."  After my teeth sank into the chewy macaron shell of the blueberry one and my mouth was filled with taste and texture sensations, a slow smile spread across my face.  "Yeah!  This is what macarons are all about!"  I've still yet to try a bought macaron.  They don't do them here in my town - I'd have to go to the food hall of Selfridges or Harrods in London I think.  But for now, these will do! ;)

Aren't they just cute?

Wednesday 18 May 2011

Rhubarb Crumble Cake

I took Minh to a local farm last weekend as I'd been up since 8am and even though it was approaching lunchtime, Daddy had not surfaced.  The farm grows its own food to sell and use in the cafe and also to feed the animals on the farm.  The animals provide meat for sale in the farm shop and cafe too.

We had a lovely walk around (well, Minh did - he was in the baby carrier hanging off my shoulders!).  I wish I'd put on proper footwear that morning as flip-flops were not the best choice for a walk!

Anyway, I saw some lovely red rhubarb stalks in the farm shop - all grown on site.  I bought them thinking I'd make a crumble.  They sat at home for a week before I put them to good use.  I wanted something cakey but with a juicy rhubarb filling.  I came up with a Rhubarb Crumble Cake.


Sponge Base:
125g unsalted butter (softened)
125g caster sugar
2 free range eggs
125g self raising flour (sifted)
1 tsp vanilla extract

Rhubarb Topping:
200-250g rhubarb (about 2-3 stalks)
3 tblsp sugar (or to taste)

Crumble:
100g plain flour
75g butter (cold and cut into small cubes)
30g caster sugar

A little demerara sugar to sprinkle (optional)

Wash the rhubarb stems and chop into 1 inch/2 cm pieces.  Place in a saucepan with 2 tablespoon of water and 3 tablespoons of sugar.  Stir as the water boils then cover and simmer for 5 mins.  The rhubarb should be beginning to soften but you do not want it all to be mushy.  Taste and sweeten if necessary.  If too sweet, add a squirt of lemon juice.  Cake is sweet and so is crumble so a little tartness is ok, but not mouth-puckering!!  On to cake making!

Preheat oven to 180c/350f/gas 4.

Grease a 7x7 inch square non-stick baking tin (I'm sure a 8 inch round will be fine) with buttery paper.  Sprinkle some self raising flour in then tip the flour to coat the inside of the pan before banging the excess out.

Beat the butter and suager together until it is soft, light and fluffy.  It gets lighter in colour the more its whipped and gives the cake a lovely light texture.

Add the vanilla to the bowl.  Crack in one egg, add a tablespoon of the (measured) self raising flour.  Mix until just combined.  Add in the remaining egg, another tablespoon of flour and again, mix until just combined.

Change to a large metal spoon (so you don't bash out that lovely air you created when beating butter and sugar), tip in half the flour and fold in.  Then tip in remainder and fold in.

Spoon mixture into the tin and using the spoon spread the mix to cover the base and a little way up the sides (to keep the rhubarb in).

Blob in the rhubarb covering the surface as best you can.  There will be gaps don't worry!  If you put too much rhubarb in, you may get a very soggy cake!

Tip the plain flour in a bowl, add the cold cubes of butter in and rub with your fingertips until it forms crumbs.  Stir in the sugar.  Use the crumble topping to cover the rhubarb.  Sprinkle the demerara sugar on top.

Place in oven and bake for 35-45 minutes.  The edges of the cake will be brown and test the centre by poking a skewer in the middle.  There shouldn't be any sloppy cake mix sticking to the skewer. 

Leave to cool in tin for 10 minutes before turning out to cool on rack.  To turn out, loosen edges of cake with a palatte knife.  Place a plate over the tin and flip over the cake tim onto the plate.  The cake should plop out onto plate.  Remove the tin, place rack on the bottom of cake and flip back to right side.

And Taaa-Daah!  :)


I used double the quantity as I made one for my neighbours too.  The cake went down well with my hubby (Mr Leaf) and he has been taking chunks of it to eat at work!

Wednesday 20 April 2011

Princess Doll Cake

I think I may have bitten off more than I could chew when I took on this cake order.   My friend asked me to make a pink & girly cake after seeing my Two-Tier creation and I jumped at the chance!  I suggested a Fairy Mushroom, Castle or Princess Cake.  The Princess won.


I've never made such a thing before but have seen a few on the internet.  Had no idea how I was going to 'dress' the doll so this was all off the cuff.  There are imperfections but by and large I'm glad I completed it.  It did take a staggering 4 hours to decorate!

I hope my friend is happy with the cake for her daughter!

As for me, well, I'm absolutely shattered so I bid you all goodnight!

Tuesday 19 April 2011

Swiss Buttercream

Apologies for lack of posts....now Minh is getting older he demands more of my time and attention.  (It doesn't get any easier!!)  I can't always put him down and leave him to play as he will turn around, see I'm gone and cry.  Such a sad unhappy cry too.  It breaks my heart & I have to rush back to give him hugs!
I also found that I couldn't leave him on sofa anymore as he would lean over too far and roll off.  Too many times I've heard a Thud!  2 second silence.  Waaaah!  WAAAAAAAAAAH!!  He has rolled off bed too!  He is far too active! :0)

Anyway, since my last birthday cake (for my niece) I've received another cake order.  This time for my old school pal.  Her daughter will be 4 later this week and I've been asked to make a pink and girlie cake.  I've come up with a Princess Cake as I've wanted to make one.  Only thing is, there is a special bell shaped tin called a Tiffin' tin that is used for the dress shape.  I can't justify buying a tin for every shape and size so I thought I'd use a stainless steel mixing bowl.  Shape wasn't quite right.  I used a pound cake recipe (4 eggs) and it's not enough to fill the bowl.  Hence a flat slightly domed shape.  Like a bump rather than a dress.  Only way round it is to imagine the Princess is seated and the dress is fluffed out around her.  Well.  I can't disappoint an old school friend!  As I'm quite new to making cakes for orders I need to make sure each one is of a relatively high standard if I am to attract new customers and future orders.  So I was out today to buy a pudding basin.  

Cake is a better shape and is cooling right now.  I plan to sandwich with jam and buttercream, cover with buttercream and partially cover with rolled fondant icing.  My two-tiered cake used a French Buttercream which was buttery and rich.  As I used my own free-range eggs from my hens, the buttercream was lemon coloured.  I want a pale cream colour so decided to try Swiss Buttercream.  It is easier as there is less faff with boiling sugar syrup to certain temperatures and the result is light, fluffy and a pale colour.

Wendy (Table for 2)  has a great tutorial on Swiss Buttercream here.  I found her site a great source of information but I decided to use something a little more simple as I don't have to work with tropical heat and humidity here.  I used this recipe here


Buttercream is chilling in fridge and excuse me while I finish putting the cake together.  I PROMISE I will share with you the details of this Princess Cake (making it up as I go along really) and also the Mango & Strawberry Flower Cake I made as well as the Two-Tiered Birthday Cake!


Hope you all have a lovely Easter & don't eat too many chocolate eggs!

Sunday 6 March 2011

Birthday Cake - Mango & Strawberry Flower

I've just finished making the birthday cake for my niece's 2nd birthday.  The celebration will be tomorrow.  Technically, in around 12hrs time, but I always call it tomorrow if it's the early hours and I've not had my sleep yet.

I'll try and remember to take pictures of the yummy Vietnamese food my SIL & her auntie will prepare, but I often forget!

Here's the finished cake!


Don't even ask me where I'm going to put the candles!!!!

As you can see, I'm quite glad I didn't put the candles in yet as the cake only j-u-s-t managed to fit into the fridge!!!!


I took plenty of photos whilst cake making - including the errors I made and I'll do a post soon of how I made this cake.

Happy Virtual Feasting!

Friday 4 March 2011

Quick Dinner - Roast Chicken


Last Friday I was in hospital for an operation to my right ear.  I have been suffering from hearing loss in that ear since my twenties and it is getting progressively worse.  It's now considered severe hearing loss.  Tinnitus,  humming and buzzing noises in my ear, are also what I have to put up with.  It can be a common problem in women after childbirth.

When I was first diagnosed with this problem a few years ago, I was not a mother.  It was unusual for a healthy person of my age to have such problems, especially as it had been giving me dizzy spells and vertigo on occasion.  In fact, it was because it had made me feel so unwell that it prompted me to go see my doctor.  After several hearing tests and even a scan (to rule out any tumours causing my hearing problem), I was diagnosed with Otosclerosis.  Hardening of the Stapes bone in the ear.  The Stapes bone is the smallest and thinnest bone in your body and it's job is to vibrate sounds up into the Cochlear (the snail shaped shell) in order for the brain to hear.  There is no explanation why I have this condition only that it is hereditary, although, I'm not aware who in my family has hearing problems.

It's not something that will get better, only worse unfortunately.  What may help is surgery to remove the Stapes bone and replace it with a plastic prosthesis.

I am recovering from surgery now and as a result need quick and easy dinner solutions.  Seeing Elin's recent post on Simple English Buttered Roast inspired me to make it for our dinner.  I had half a free-range chicken in the fridge needing to be cooked so it was a perfect opportunity.  I teamed the chicken up with roast potato & sweet potato wedges and cauliflower cheese.  Something simple for me to knock up in the kitchen and pop in the oven to feed Mr Leaf and myself.  I even mashed some of the cauliflower and cheese for Baby Leaf's dinner!  Thank you Elin for an inspiring and tasty dish!  Don't forget to visit her blog to see how the chicken was roasted!

I haven't been baking cakes or bread whilst recuperating but today is our niece's 2nd birthday and I've promised my SIL to bake a cake for the birthday girl.  It will be a fruit and cream decorated chiffon so nothing too strenuous.  Will post the creation when it's made.

Sunday 20 February 2011

Peach Upside-Down Cake


Thought I'd try post while the is cake still warm!  Makes a change - usually the post is well after the event and you'd be lucky if there is any cake left!!!

This is very similar to the ubiquitous Fruit Pastry Cake which I have made several times.  I love adding a mix of fresh fruit like raspberries, peaches and kiwi.  Blueberries are really good too!  I find it's great for sharing at work as you can make it in a large tin and cut it into squares - enough to go round!  If you google Fruit Pastry Cake you will find enough recipes floating around.
Nicely browned and risen after baking

There is a reason why the base of the tin should be lined!

The original recipe calls for peaches and I had nectarines at home - to me they are the same except they are fuzz-free.  I tweaked the recipe a little as this is my second time baking it and although the original is good, I didn't see the point of baking this with brown sugar as it made the cake look a murky brown colour and not very appetising.  Also it calls for 250g sour cream.  This I found was far too much and it made the cake heavy and dense - hubbs (Mr Leaf) still liked it as it was moist.

If you dust enough icing sugar on it no-one will see the patches!

Peach Upside-Down Cake (adapted from "cakes & bakes from my mother's kitchen" ~ Linda Collister)

4 fresh nectarines (original recipe calls for large peaches)
125g unsalted butter, softened
185g caster sugar (changed from light soft brown sugar)
3 eggs, separated
185g self-raising flour
90g greek natural yoghurt (reduced from 250g of sour cream, I had yoghurt in fridge so used that)
1/4 teaspoon cream of tartar (the original recipe does not include this)
icing sugar for dusting

17cm / 7" square tin (23cm springform cake tin, base lined and lightly greased)

Preheat oven to 180C / 350F / gas 4.

Score the nectarine into quarters and twist the fruit to open.  Remove the stone and arrange the quartered fruit on the bottom of the prepared cake tin and set to one side. 

Put the butter and sugar in a large bowl and beat until the mixture is light and fluffy.  Add the egg yolks 1 at a time, beating well after each addition.  Fold the flour and yoghurt in 2 batches.

In a separate grease-free bowl, whisk the egg whites until they are foamy.  Add the cream of tartar and continue to whisk until they form stiff peaks.  Using a large metal spoon, fold the egg whites into the cake mixture in 2 batches.  Spoon the mixture over the fruits and bake in the preheated oven for 40-50 minutes, until the top is golden and the centre springs back when gently pressed.

Leave to cool in tin for 10 minutes, then carefully turn out and peel off paper.  Dust with icing sugar.


 Don't forget to line the base of your tin with paper!  I omitted this step and found parts of the cake stuck to the tin!  Being non-stick, I did manage get them out and lay them back on the cake where they came from - a liberal shaking of icing sugar and if you won't tell, no-one will know!!!

Wonderful served warm from oven with vanilla ice-cream or a dollop of softly whipped cream!


Found some photos from when I first made this in October 2010 (I did mean to blog it!).


I didn't have enough peaches (only 3) so I cut them into 1/6 to fill the pan.


 See, the cake is quite dense and not a very attractive shade of butterscotch.  I think it would look more appealing if it was a golden yellow cake.  I was disappointed with the outcome as I felt it too heavy.  When I follow a recipe book I expect the results to be good.  I decided that if I were to make it again I would make it like Fruit Pastry Cake which always turns out well.


Ice cream goes down well with most cake - think I was out of vanilla here and had Ben & Jerry's!

Friday 18 February 2011

Meringue Roulade - (Flourless so gluten free!) Recipe included!

Each week there is a coffee meet with mum's and babies that I go to when I can.  It started with three of us who met at Aqua-Natal.  After I gave birth to Minh, we arranged to meet for coffee and it stemmed from there.  Slowly the group has grown from adding a few more aqua girls, then people adding friends with new babies too.  Although this is nice, it does mean that it can be difficult to catch up with those you really want to.  Have you considered how much room us mums and babies take up?  Some of the mum's walk to the coffee meets so there are always lots of baby buggies!

Well, four of us aqua girls decided to have a mini-gathering earlier this week and one of us offered their home as a venue.  She said she would make us soup for lunch so I said I'd bring cake.  I don't need much persuasion to get into the kitchen to bake really!  I had intended to bake the night before the gathering but had spent longer at the airport seeing Mr Plum off (returning to Hong Kong).  Dad's flight was cancelled and he was transferred to the next flight which was 3 hours later.  Mum & me (oh and Minh) kept Dad company to while away the time.  It was late when I got home and Mr Leaf was in bed asleep (oops! we didn't have much of a Valentine's Day together!!!) so it meant no baking until the morning. 

The host I learnt, is wheat-intolerant.  A bit of a bother when it comes to cakes but there are a few recipes that are flourless.  Over Christmas I treated myself to a cookbook, The Great British Book of Baking.  I remembered admiring a cake in the book thinking how delicious it looked and vaguely recollecting it was flourless.

It was surprisingly easy to make, light and delicious!  Very melt-in-the-mouth!


I made a few tweaks here and there but essentially, it's from the book.  The photo isn't great as we were so looking forward to enjoying the cake I almost forgot to take a picture!

I'll post the recipe later as it's late here now.  I'll just let you drool over the picture!  Heh Heh Heh!

Raspberry Meringue Roulade (adapted from The Great British Book of Baking)

Meringue
4 medium free-range egg whites at room temperature
1 teaspoon lemon juice (I didn't bother but used 1/4 tsp cream of tartar)
225g caster sugar
1 teaspoon cornflour (mine was quite heaped)
2 tablespoons flaked almonds (a small handful)

Filling
250ml whipping cream, well chilled (I used a 284ml pot of Emlea double cream, dairy cream alternative )
250g fresh raspberries (or other prepared fruit) (shop didn't have raspberries so I used handful of blueberries and handful of sliced strawberries)

Finish  (I didn't have time to do fancy bit - would be a nice touch if serving as a dinner party dessert)
250g fresh or frozen raspberries
1 teaspoon lemon juice
4 tablespoons icing sugar or to taste

20 x 30cm Swiss roll tin brushed with oil and lined with baking paper - not greaseproof paper (I just lined my tin without the oil - makes washing up easier)

Heat oven to 150 C / 300 F / gas 2.  Put egg whites and lemon juice into a spotlessly clean and grease-free bowl and whisk with an electric whick, a large mixer or rotary whisk until they form stiff peaks when the whisk is lifted from the bowl.  (I put the whites into the bowl of my stand mixer and whisked until large bubbles formed - like washing-up bubbles.  I then added the 1/4 tsp of cream of tartar and continued to beat until the stiff peak stage.)  Mix the sugar with the cornflour and whisk into the egg whites a tablespoon at a time, to make a stiff and glossy meringue.  (The addition of cornflour helps get that chewy toffee texture in the meringue.)

Transfer the mixture to the prepared tin and spread evenly.  Scatter the flaked almonds over the top of the meringue (I miss-read the recipe and sprinkled flaked almonds on the base before adding meringue.  I guess the almods would become nice and toasty if I put them on top as directed!) and bake in the heated oven for 45 minutes, until risen, golden brown and firm to the touch - the centre will still be slightly soft.  Turn the meringue out on to a sheet of non-stick baking paper and lift off the tin.  (Using the paper, I lifted the meringue out of tin, carefully laid it face-down and peeled off paper, then laid it back on the paper to cool completely.  Didn't want to waste paper.) Leave to cool for 10 minutes, then gently peel off the lining paper.  Leave until completely cold before filling.

When ready to finish, whip the chilled cream until very thick. almost to stiff peak stage - if the cream is too firm, though, it will be difficult to spread.  Spread the cream evenly over the meringue (remember you want to spread the side with no almonds as that will be presentation side, my presentation side was the bottom as I put almonds on wrong side!) and top with the raspberries.  Roll up the roulade from one long side, using one hand to guide the meringue into shape and the other to use the paper to support the meringue and pull it into shape as it rolls up.  Once the meringue has become a roulade, use the paper around the roulade to hold it in shape by wrapping it firmly.  Chill for an hour before serving.  A good accompaniment is some fresh or frozen berries whizzed up with lemon juice and icing sugar to make a thick sauce or puree.  The roulade can be made several hours in advance, but is best eaten the same day.  To serve, cut the roulade into thick slices and spoon over a little of the raspberry sauce.

Us girlies didn't chill the roulade as we didn't have time.  After baking the meringue, I cooled it for an hour by an open window then transported it in its tin to my friend's house.  Once there, I whipped up the cream until fairly stiff but softer than you would use if you were piping it.  Slathered the meringue with the cream and topped with blueberries and chopped strawberries.  Rolled the meringue so the long sides met one another then we sliced straight away.  It was heavenly!  Not overly sweet but was so light and melt-in-mouth!  Really beautiful!  Looks impressive but easy to prepare!

Wednesday 16 February 2011

Hakka Steamed Radish Dumpling ~ 蘿蔔粄 (Law Pet Ban)

Both my parents are Hakka descendants and when we were little wewere taught to speak our parents' mother tongue, Hakka.  As we grew older, English quickly became our preferred language as we were surrounded in English language through school, television and our friends.  We still had to speak Chinese at home to our parents though and we even went to Chinese School to learn how to read and write in Cantonese.  Nowadays, we mainly speak Cantonese at home. 

Mealtimes were almost always Chinese meals and often Hakka specialities.  Sometimes mum would make Hakka snacks, one of these were Radish Dumplings 蘿蔔粄 (Law Pet Ban).

It has a soft dough that almost sticks to your teeth without being tough and chewy and is filled with shredded radish which is seasoned with lots of white pepper, sweetened with dried shrimps with ground pork and Chinese mushrooms for added flavour.

She made these back in November (I've been meaning to blog about so many things!  I have a backlog building up!) and although I wanted to help her - the technique she used to roll the dough skin seemed tricky.  She was precise with the dough skin, it had to be a certain thickness and if it wasn't right she would scrunch the dough up and start again. 


 Here you can see her rolling the dough around an orange.  This is so it will have the 'cupped' shape which is then generously filled.


Stuffed and steamed ready for sampling! Mmm!  Reminds me of my childhood days!


Tuesday 15 February 2011

Two-Tier Stacked Cake - 1st Birthday Cake

Not very good with posts this year.  Being up to lots of kitchen hi-jinks recently and finding the time to blog them is hard.  (Maybe spending my baby free-time on facebook is not constructive!)

Anyway....last week I was busy making a special birthday cake for my friend's daughter.  It was her 1st birthday on Saturday 12th February.  I was honoured that my friend had asked to make the cake and I was lucky enough that my friend had no specific requests for the cake.  It had to feed 20 people and it was to be a vanilla flavoured cake with fondant icing on it.

I decided that I would make a stacked cake so there would be more than enough cake to go round.  I made a 6" chocolate cake sat atop an 8".

All in all, I was pleased with the outcome.  I had some hiccups towards the end and learnt some valuable mistakes.  Most of all, my friend was overwhelmed with the cake and her friends and family all ooh-ed and ahh-ed.  Even the waiting staff at the restaurant admired the cake!


Wednesday 2 February 2011

Chinese New Year 2011


Welcome in the Year of the Rabbit!


I wish you all a Happy Chinese New Year!!!


Wishing you good fortune, good health and your wishes come true!

恭喜發財,
身體健康, 
心想事成

Saturday 15 January 2011

Dim Sum Delights - Imperial China (Watford)

I luuuuurve Dim Sum!  Yum Yum Yum in my Tum!  It was one of those treats I remember as a kid that we had every now and again in Chinatown.  I think I've probably been FOUR times in the past month as my Dad is over from Hong Kong for a while.  I'm not complaining though!  :0D  I often drool at blogs where people review their dim sum treats and the restaurant they visited.  Well, I'm not a dim sum connoisseur by any means but I thought I'd engage in some photo posting to make you all droooooool over your keyboards! Heh Heh Heh!  Mean aren't I?

Baked Shredded Turnip Pastry '千絲蘿蔔酥'
 Here's what we ate at Imperial China (Watford) 15 December 2010.

Cuttlefish Cakes with Coriander '香莤墨魚餅'

This was the first dim sum outing I took Dad to.  I was excited to hear of a new Chinese Restaurant opening in Watford, Hertfordshire.  Even more so when it was a restaurant with dishes aimed at Chinese people, not western palates!  It does dim sum too!?!?!  RESULT!  It has a sister restaurant in London's Chinatown and I've yet to sample the fare there but I've read that it's good. 

Imagine my horror when I discover the Watford site has a two-tier pricing policy!?!?  Monday to Friday is the first price banding and not cheap either for that matter!  Weekends you will be expected to pay around 40p-80p more on your dim sum dishes!  Making a list of items we would normally order if having dim sum (just myself and Mr Leaf), it worked out we would spend £10 more if we ate there at weekends! 

Crispy Dough Cheung Fun '蔥花炸兩腸'
 Luckily, Mr Leaf gets a 20% reduction on his bill by working in an office near the new restaurant.  It brings the bill in line with what we pay at our regular dim sum venue.  On our visit there, Mr Leaf was particularly pleased as after I submitted the dim sum tick sheet, I gave him a call and he took that as his cue to leave the office.  He took his lunch break and joined my dad, (Mr Plum) and myself for dim sum lunch.  This means less of his lunchtime is taken up by waiting for food to arrive.  Cunning.

Steamed Pork Buns '蜜汁叉燒飽'
 There is a good selection of dim sum delicacies on the menu (a laminated picture sheet with letters by each dish as well as Chinese and English names).  The tick sheet is two-sided.  English on one side, Chinese on the other.  All items correspond with the lettering on the photo menu too.  Here's a link to their menu so you can have a good drool there too! :0p

Steamed Pork Dumplings '上海小籠飽'
 Food wasn't too slow to arrive and was tasty enough.  The skill in making the Baked Shredded Turnip Pastry '千絲蘿蔔酥' was good and the filling was nice but perhaps lacked a certain oomph.  It was served lukewarm and was a bit oil-laden.  It should be described as Deep-Fried, it was no way oven baked. The Crispy Dough Cheung Fun '蔥花炸兩腸' was served with soy sauce separately - a nice touch I thought.  The dough stick was crispy but did taste of old oil. 

Prawn Dumpling with Chives '鮮蝦韭菜餃'


Pork Dumplings with Vegetables '菜甫鮮肉菜餃'
 My absolutely favourite dish was Pork Dumplings with Vegetables '菜甫鮮肉菜餃'.  One bite into these cute dumplings (I think they were supposed to look like Green Pak Choi!) revealed a juicy filling.  I tasted dried shrimp, Chinese mushroom and some preserved radish.  So flavoursome and memorable!

Steamed Rice with Spare Ribs and Chicken Claws '鳳爪排骨飯'
I would visit again but only on a weekday and with Mr Leaf so we could get the discount too.


*** NOTE:
...and I won't blog about such tasty delicious dim sum delights at silly o'hour as it's made me hungry and I REALLY crave dim sum right now!